Explore Cognitive Services
Note To complete this lab, you will need an Azure subscription in which you have administrative access.
Azure Cognitive Services encapsulate common AI functionality that can be categorized into four main pillars: vision, speech, language, and decision services. In this exercise you will take a look at one of the decision services to get a general sense of how to provision and use a cognitive services resource in a software application.
The specific cognitive service you’ll explore in this exercise is Anomaly Detector. Anomaly Detector is used to analyze data values over time, and to detect any unusual values that might indicate a problem or an issue for further investigation. For example, a sensor in a temperature-controlled storage facility might monitor the temperature every minute and log the measured values. You can use the Anomaly Detector service to analyze the logged temperature values and flag any that fall significantly outside of the normal range of expected temperatures.
To test the capabilities of the Anomaly Detection service, we’ll use a simple command-line application that runs in the Cloud Shell. The same principles and functionality apply in real-world solutions, such as web sites or phone apps.
Note The goal of this exercise is to get a general sense of how cognitive services are provisioned and used. Anomaly Detector is used as an example, but you are not expected to gain a comprehensive knowledge of anomaly detection in this exercise!
Create an Anomaly Detector resource
Let’s start by creating an Anomaly Detector resource in your Azure subscription:
-
In another browser tab, open the Azure portal at https://portal.azure.com, signing in with your Microsoft account.
- Click the +Create a resource button, search for Anomaly Detector, and create an Anomaly Detector resource with the following settings:
- Subscription: Your Azure subscription.
- Resource group: Select an existing resource group or create a new one.
- Region: Choose any available region.
- Name: Enter a unique name.
- Pricing tier: Free F0
-
Review and create the resource. Wait for deployment to complete, and then go to the deployed resource.
- View the Keys and Endpoint page for your Anomaly Detector resource. You will need the endpoint and keys to connect from client applications.
Run Cloud Shell
To test the capabilities of the Anomaly Detector service, we’ll use a simple command-line application that runs in the Cloud Shell on Azure.
-
In the Azure portal, select the [>_] (Cloud Shell) button at the top of the page to the right of the search box. This opens a Cloud Shell pane at the bottom of the portal.

-
The first time you open the Cloud Shell, you may be prompted to choose the type of shell you want to use (Bash or PowerShell). Select PowerShell. If you do not see this option, skip the step.
-
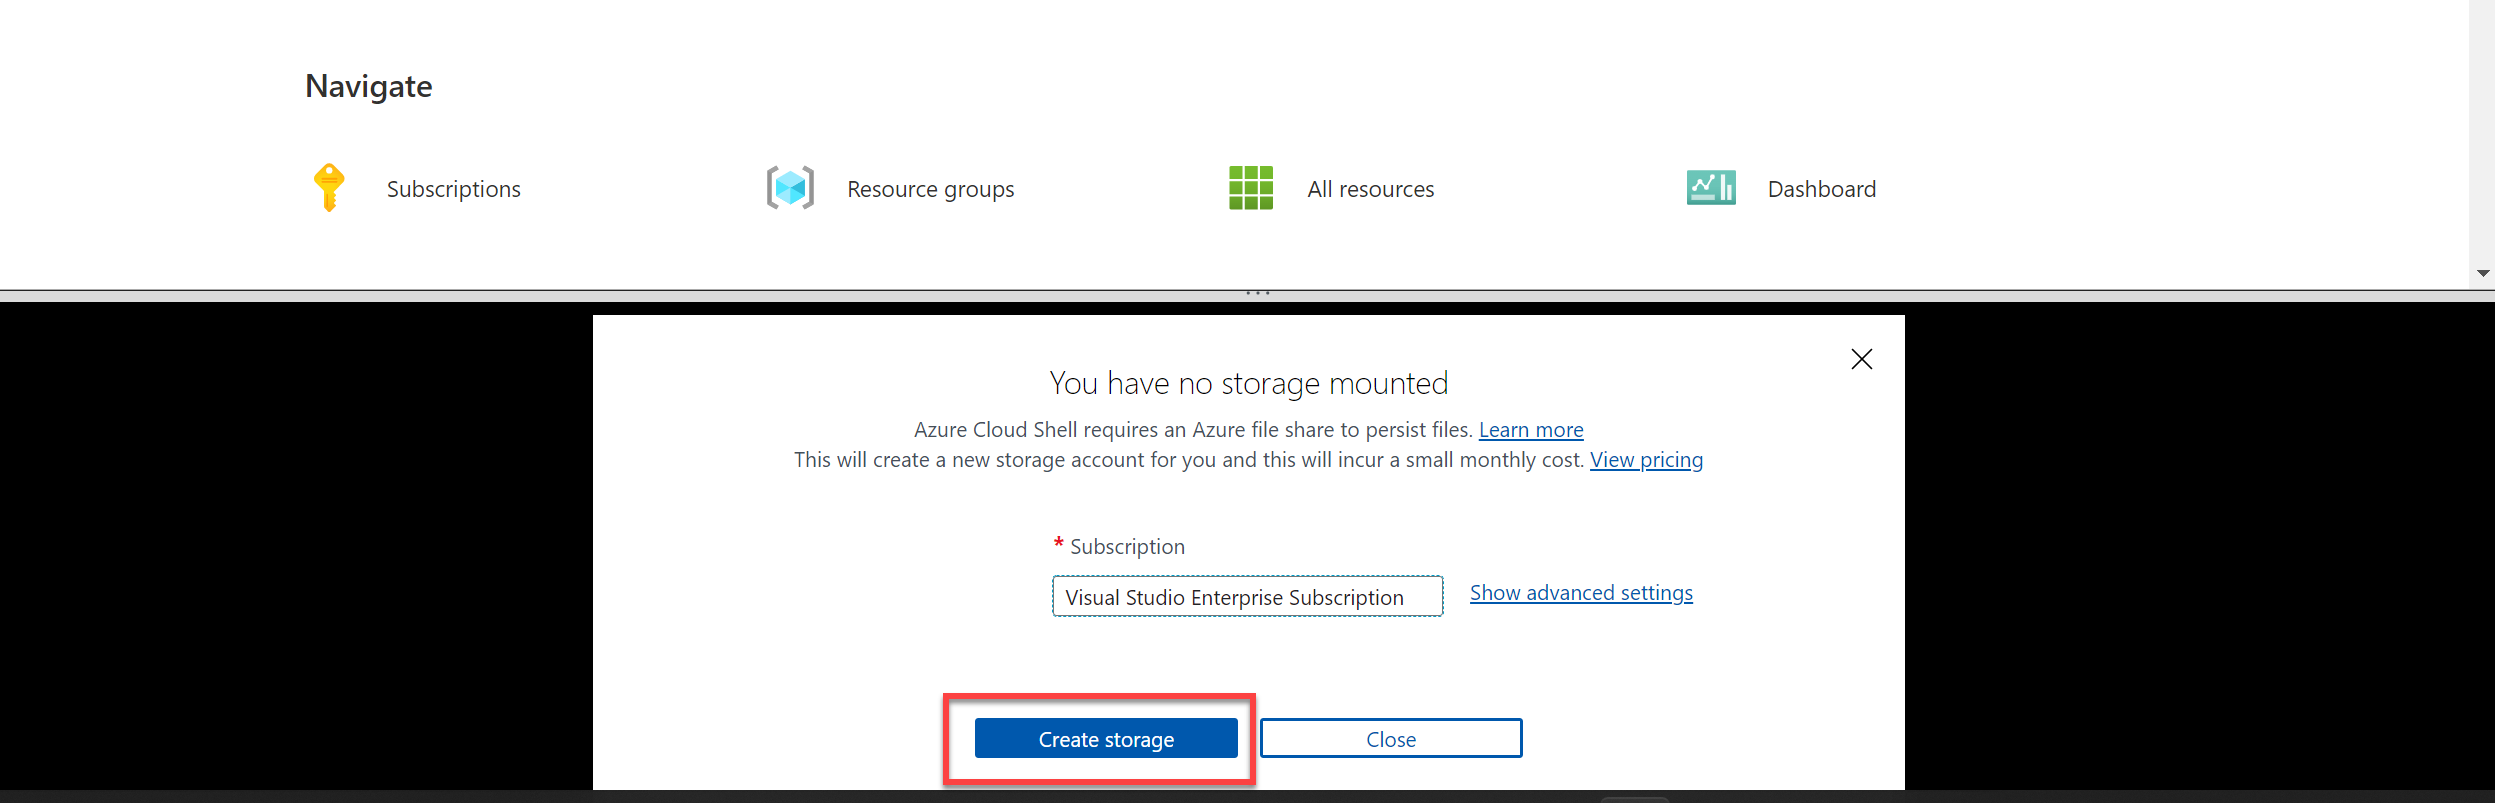
If you are prompted to create storage for your Cloud Shell, ensure your subscription is specified and select Create storage. Then wait a minute or so for the storage to be created.
-
Make sure the type of shell indicated on the top left of the Cloud Shell pane is switched to PowerShell. If it is Bash, switch to PowerShell by using the drop-down menu.

-
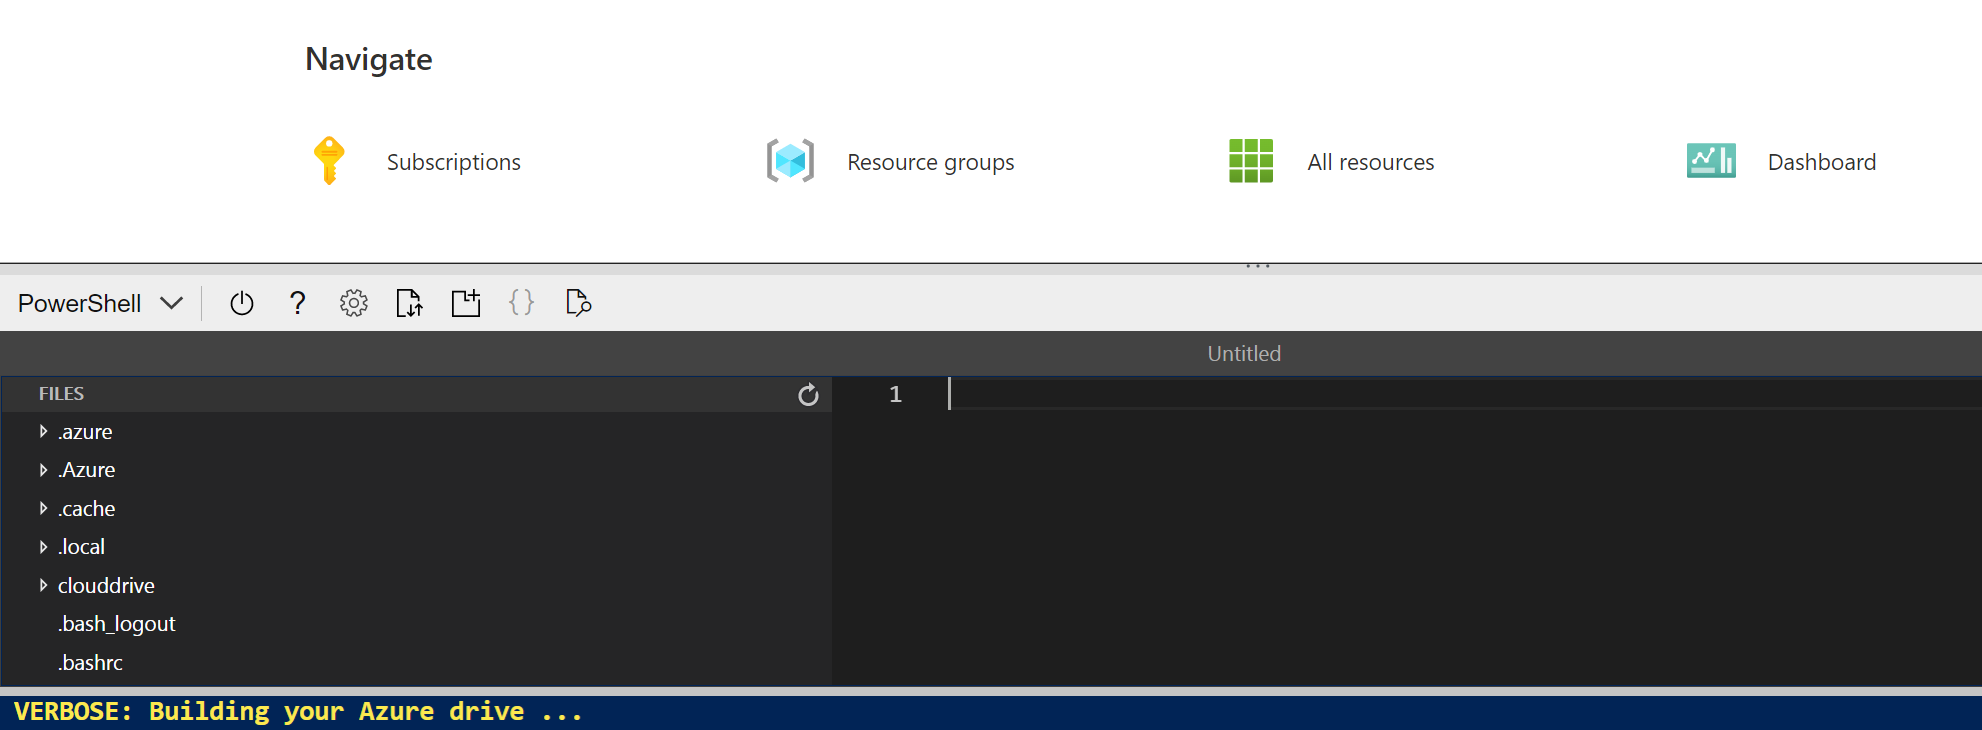
Wait for PowerShell to start. You should see the following screen in the Azure portal:

Configure and run a client application
Now that you have a Cloud Shell environment, you can run a simple application that uses the Anomaly Detector service to analyze data.
-
In the command shell, enter the following command to download the sample application and save it to a folder called ai-900.
git clone https://github.com/MicrosoftLearning/AI-900-AIFundamentals ai-900Tip If you already used this command in another lab to clone the ai-900 repository, you can skip this step.
-
The files are downloaded to a folder named ai-900. Now we want to see all of the files in your Cloud Shell storage and work with them. Type the following command into the shell:
code .Notice how this opens up an editor like the one in the image below:
-
In the Files pane on the left, expand ai-900 and select detect-anomalies.ps1. This file contains some code that uses the Anomaly Detection service, as shown here:
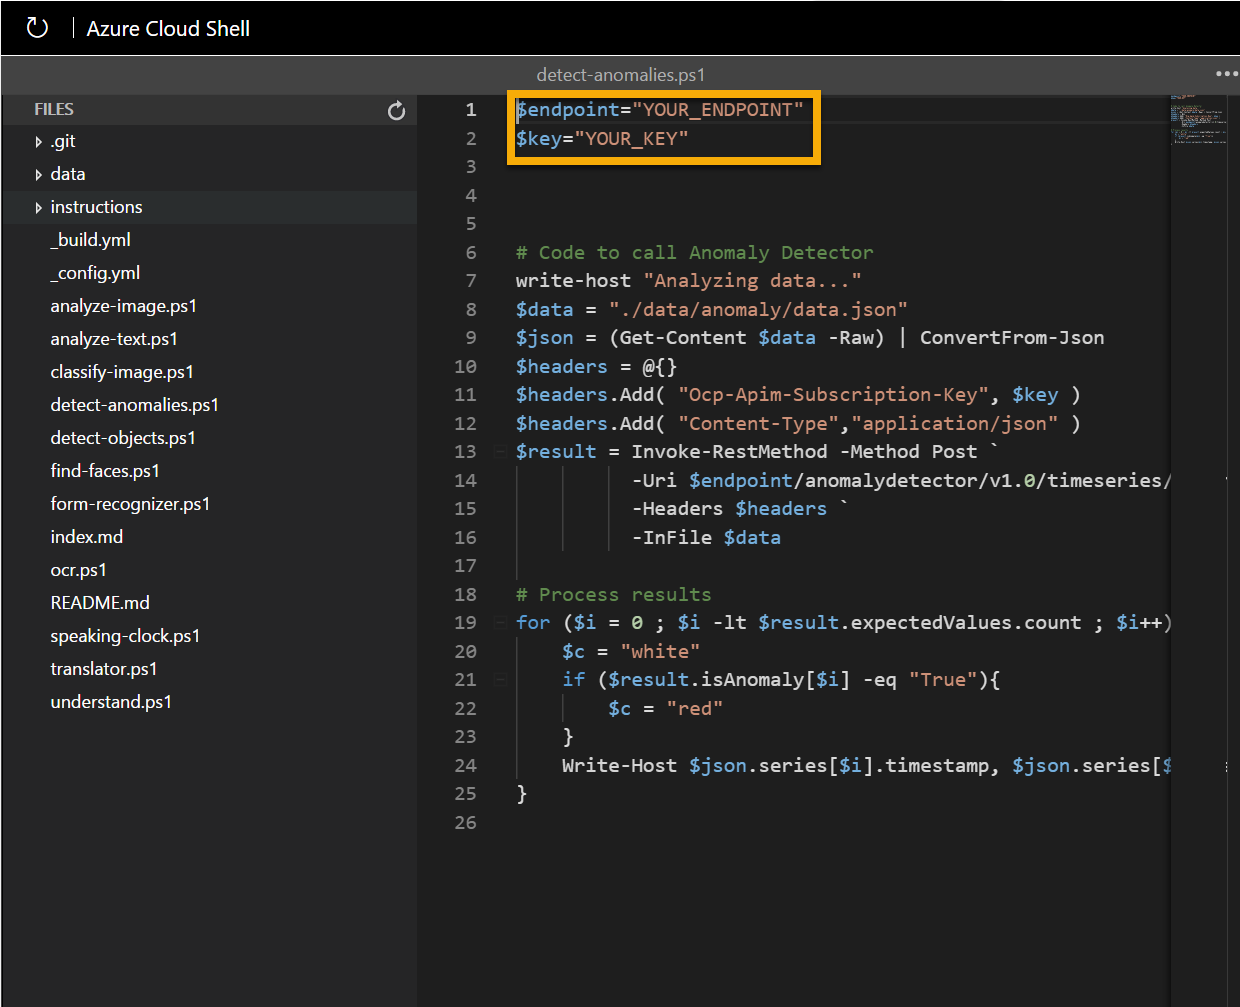
-
Don’t worry too much about the details of the code, the important thing is that it needs the endpoint URL and either of the keys for your Anomaly Detector resource. Copy these from the Keys and Endpoints page for your resource (which should still be in the top area of the browser) and paste them into the code editor, replacing the YOUR_KEY and YOUR_ENDPOINT placeholder values respectively.
Tip You may need to use the separator bar to adjust the screen area as you work with the Keys and Endpoint and Editor panes.
After pasting the key and endpoint values, the first two lines of code should look similar to this:
$key="1a2b3c4d5e6f7g8h9i0j...." $endpoint="https..." -
At the top right of the editor pane, use the … button to open the menu and select Save to save your changes. Then open the menu again and select Close Editor.
Remember, anomaly detection is an artificial intelligence technique used to determine whether values in a series are within expected parameters. The sample client application will use your Anomaly Detector service to analyze a file containing a series of date/times and numeric values. The application should return results indicating at each time point, whether the numeric value is within expected parameters.
-
In the PowerShell pane, enter the following commands to run the code:
cd ai-900 .\detect-anomalies.ps1 -
Review the results, noting that the final column in the results is True or False to indicate if the value recorded at each date/time is considered an anomaly or not. Consider how we could use this information in a real-life situation. What action could the application trigger if the values were of fridge temperature or blood pressure and anomalies were detected?
Learn more
This simple app shows only some of the capabilities of the Anomaly Detector service. To learn more about what you can do with this service, see the Anomaly Detector page.
Clean-up
It’s a good idea at the end of a project to identify whether you still need the resources you created. Resources left running can cost you money.
If you are continuing on to other AI Fundamentals modules you can keep your resources for use in other labs.
If you have finished learning, you can delete the resource group or individual resources from your Azure subscription:
-
In the Azure portal, in the Resource groups page, open the resource group you specified when creating your resource.
-
Click Delete resource group, type the resource group name to confirm you want to delete it, and select Delete. You can also choose to delete individual resources by selecting the resource(s), clicking on the three dots to see more options, and clicking Delete.