14 - Manage access with RBAC (5 min)
In this walkthrough, we will assign permission roles to resources and view logs.
Task 1: View and assign roles
In this task, we will assign the Virtual machine contributor role.
-
Sign in to the Azure portal.
-
From the All services blade, search for and select Resource groups, then click +Add +New +Create.
-
Create a new resource group. Click Create when you are finished.
Setting Value Subscription Use default provided Resource group myRGRBAC Region (US) East US -
Create Review + create and then click Create.
-
Refresh the resource group page and click the entry representing the newly created resource group.
- Click on the Access control (IAM) blade, and then switch to the Roles tab. Scroll through the large number of roles definitions that are available. Use the Informational icons to get an idea of each role’s permissions. Notice there is also information on the number of users and groups that are assigned to each role.
-

-
Switch to the Role assignments tab of the myRGRBAC - Access control (IAM) blade, click + Add and then click Add role assignment. Search for the Virtual Machine Contributor role and select. Switch to the “Members” tab and Assign access to: User, group, or service principal. Then click + Select members and type in your name to the popup search function and hit ‘select.’ Then hit ‘Review and Assign’

Note: The Virtual machine contributor role lets you manage virtual machines, but not access their operating system or manage the virtual network and storage account they are connected to.
-
Refresh the Role assignments page and ensure you are now listed as a Virtual machine contributor.
Note: This assignment does not actually grant you any additional provileges, since your account has already the Owner role, which includes all privilges associated with the Contributor role.
Task 2: Monitor role assignments and remove a role
In this task, we will view the activity log to verify the role assignment, and then remove the role.
-
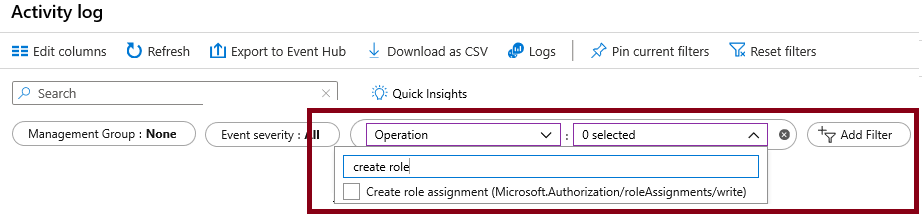
On the myRGRBAC resource group blade, click Activity log.
-
Click Add filter, select Operation, and then Create role assignment.
-
Verify the Activity log shows your role assignment.
Note: Can you figure out how to remove your role assignment?
Congratulations! You created a resource group, assigned an access role to it and viewed activity logs.
Note: To avoid additional costs, you can optionally remove this resource group. Search for resource groups, click your resource group, and then click Delete resource group. Verify the name of the resource group and then click Delete. Monitor the Notifications to see how the delete is proceeding.